ModdingDEPRECATED: Difference between revisions
Created page with "JUST FOR ARCHIVE PURPOSES The Onsets Scripting API is what other games call "modding". Since scripting is the main feature of Onsets, Onset can be seen as modding "by default..." |
No edit summary |
||
| (One intermediate revision by the same user not shown) | |||
| Line 1: | Line 1: | ||
JUST FOR ARCHIVE PURPOSES | '''JUST FOR ARCHIVE PURPOSES, DO NOT DELETE''' | ||
The Onsets Scripting API is what other games call "modding". Since scripting is the main feature of Onsets, Onset can be seen as modding "by default". | The Onsets Scripting API is what other games call "modding". Since scripting is the main feature of Onsets, Onset can be seen as modding "by default". | ||
Latest revision as of 00:12, 12 December 2019
JUST FOR ARCHIVE PURPOSES, DO NOT DELETE
The Onsets Scripting API is what other games call "modding". Since scripting is the main feature of Onsets, Onset can be seen as modding "by default".
This guide is just for how to import additional 3D models to Onset.
Workflow
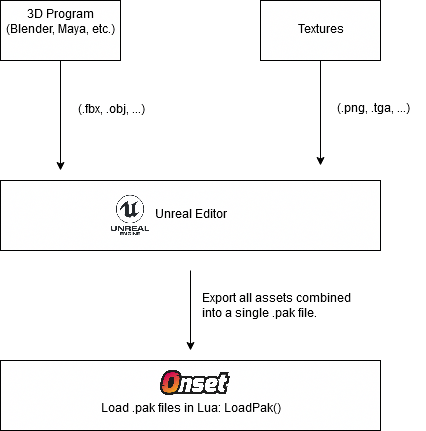
Onset uses the Unreal Engine and therefore uses it's modding pipeline to load additional content. Unfortunately this process it not easy in Unreal, so already having a bit of experience in Unreal will definitely help you.
You can import any 3D models from any 3D program into Unreal (FBX, OBJ). Unreal will create a .pak file out of your assets that can then be loaded in Onset.
Lua Modding Functions
Onset Engine Version & Modding SDK
| Versions | |||||
|---|---|---|---|---|---|
| Onset Version | Engine Version | SDK Download | |||
| 1.0.0 | UE 4.23 | https://dev.playonset.com/OnsetModding_423_v1.0.zip | |||
Install Unreal Engine
You first need to install the Unreal Engine. See the above table for what version is required.
https://docs.unrealengine.com/en-US/GettingStarted/Installation/index.html
Create the Unreal Mod Project
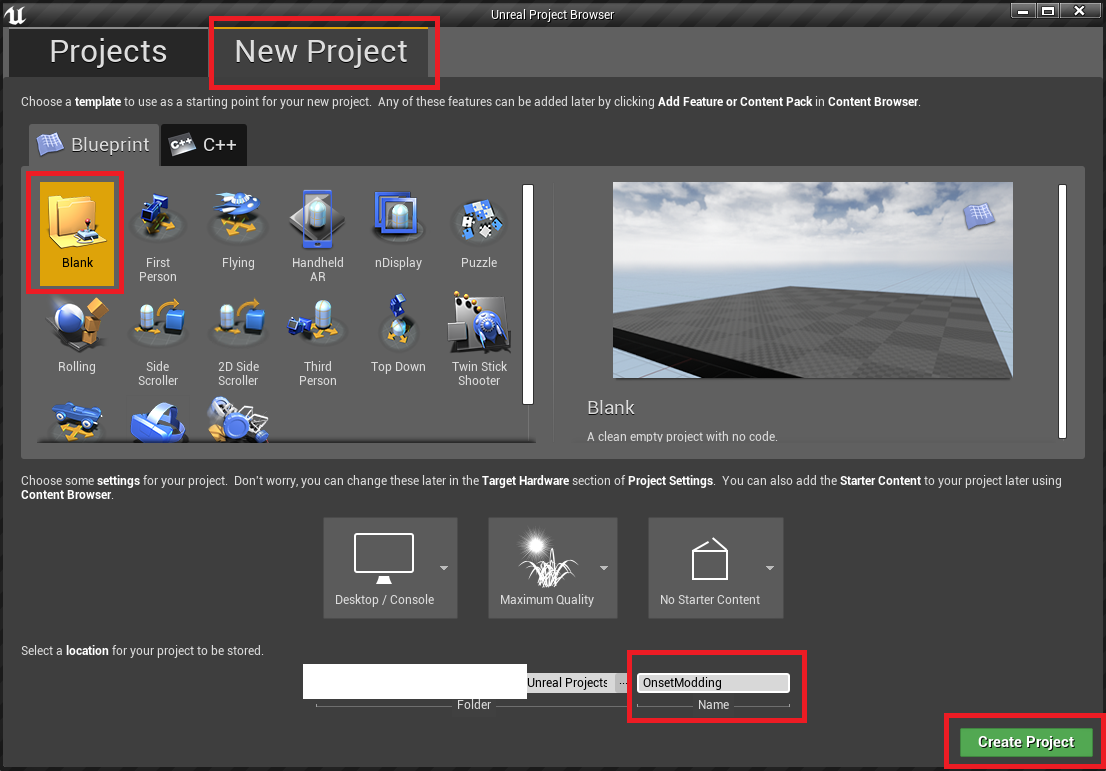
After installing the Unreal Engine, launch it.
Name your project and then click Create Project. This is not the name of the mod.
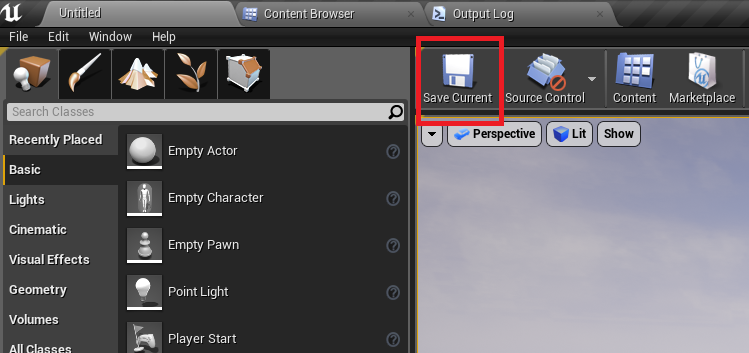
First thing to do is to save the initial map. Unreal Engine requires this later on for the packaging process. Hit the "Save Current" button.
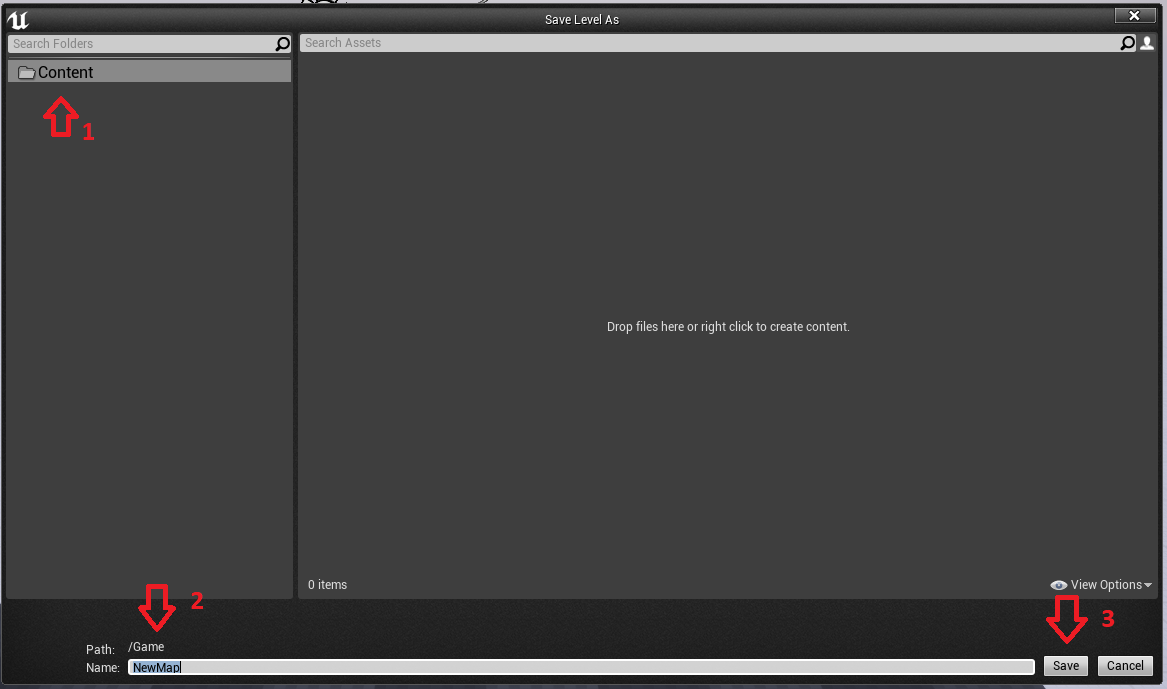
Make sure it looks like this and then click "Save".
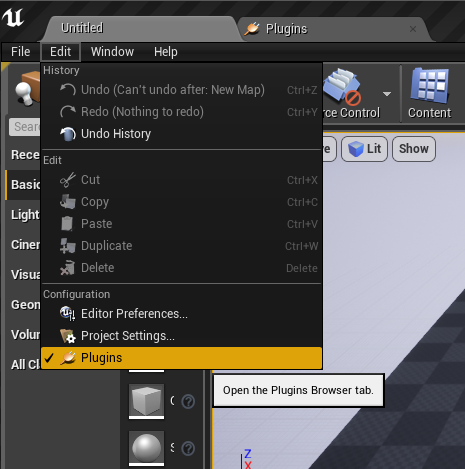
Go to Edit -> Plugins
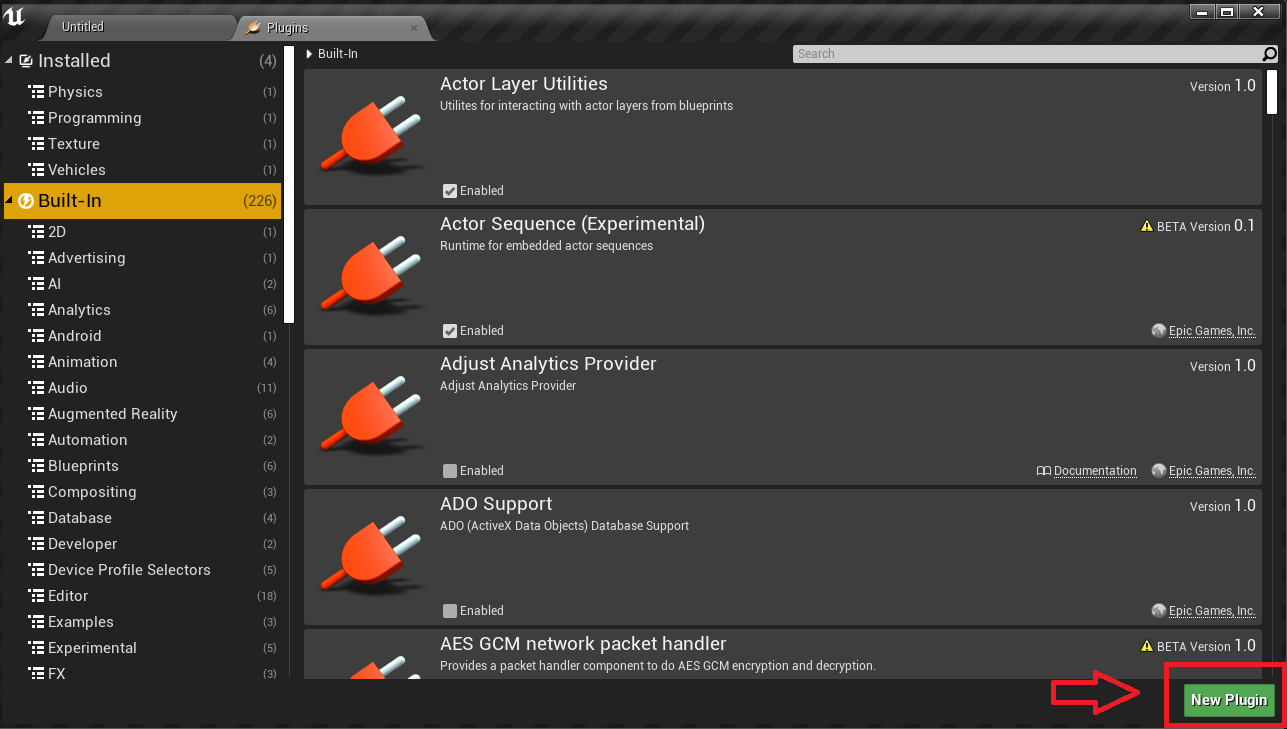
Select "New Plugin"
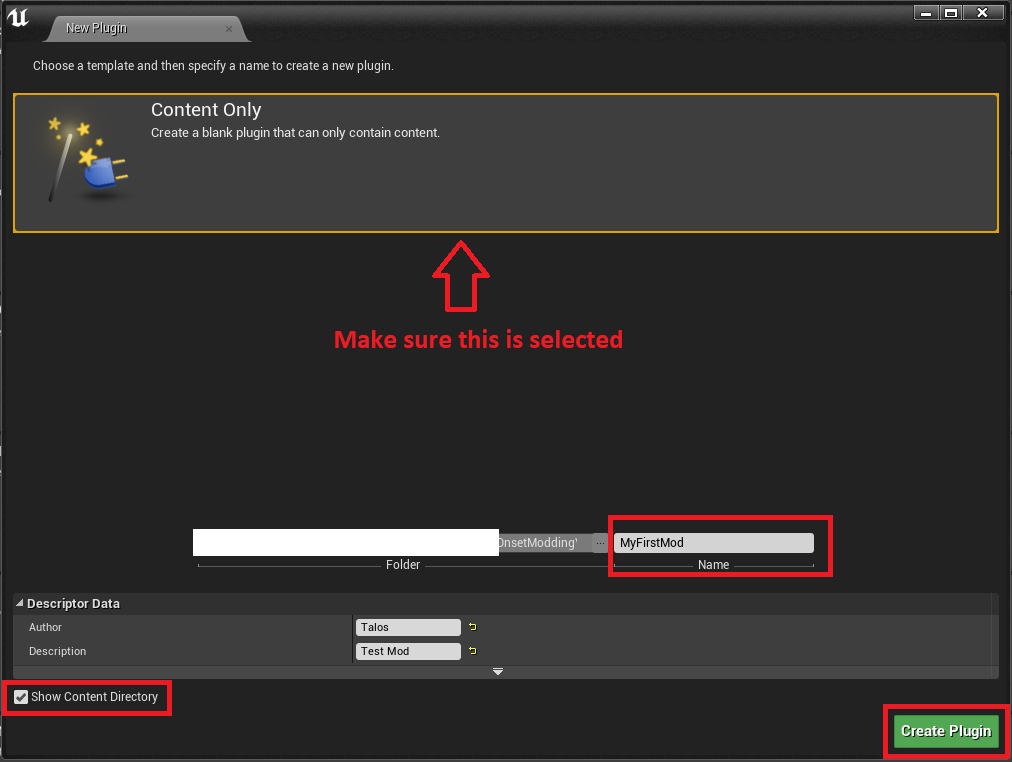
Select "Content Only". Enter a mod name. Make sure "Show Content Directory" is ticked. Then click "Create Plugin". The name of the mod is really important as we need that later one. So remember that.
You will see this message.
Introduce Content
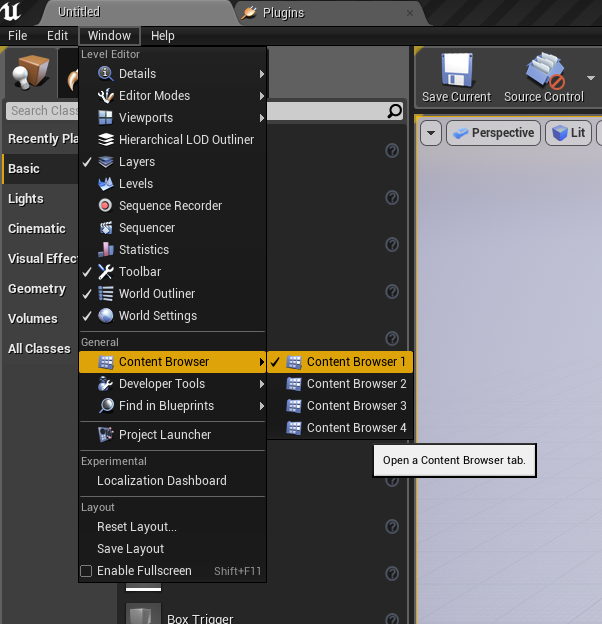
Open the Content Browser.
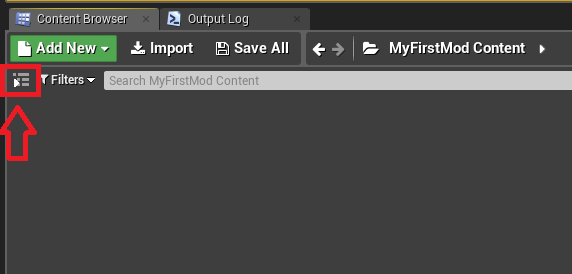
Click this icon to get a folder overview.
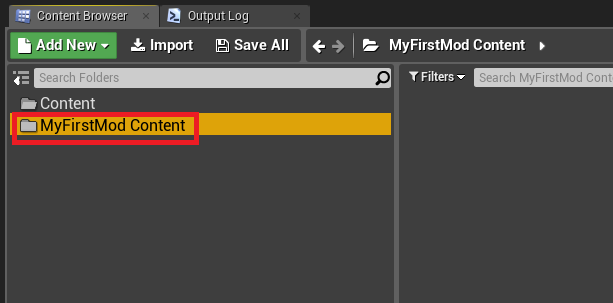
All files that you import will need to be placed inside your mod content folder (MyFirstMod).
If you are familiar with Unreal then you can skip this:
Import3DModel
You can also watch any Unreal tutorial on YouTube on how to add and setup your models in Unreal.
Package your content
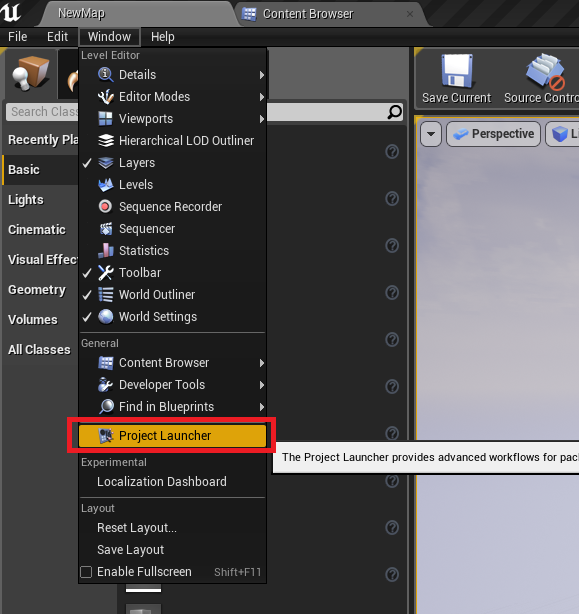
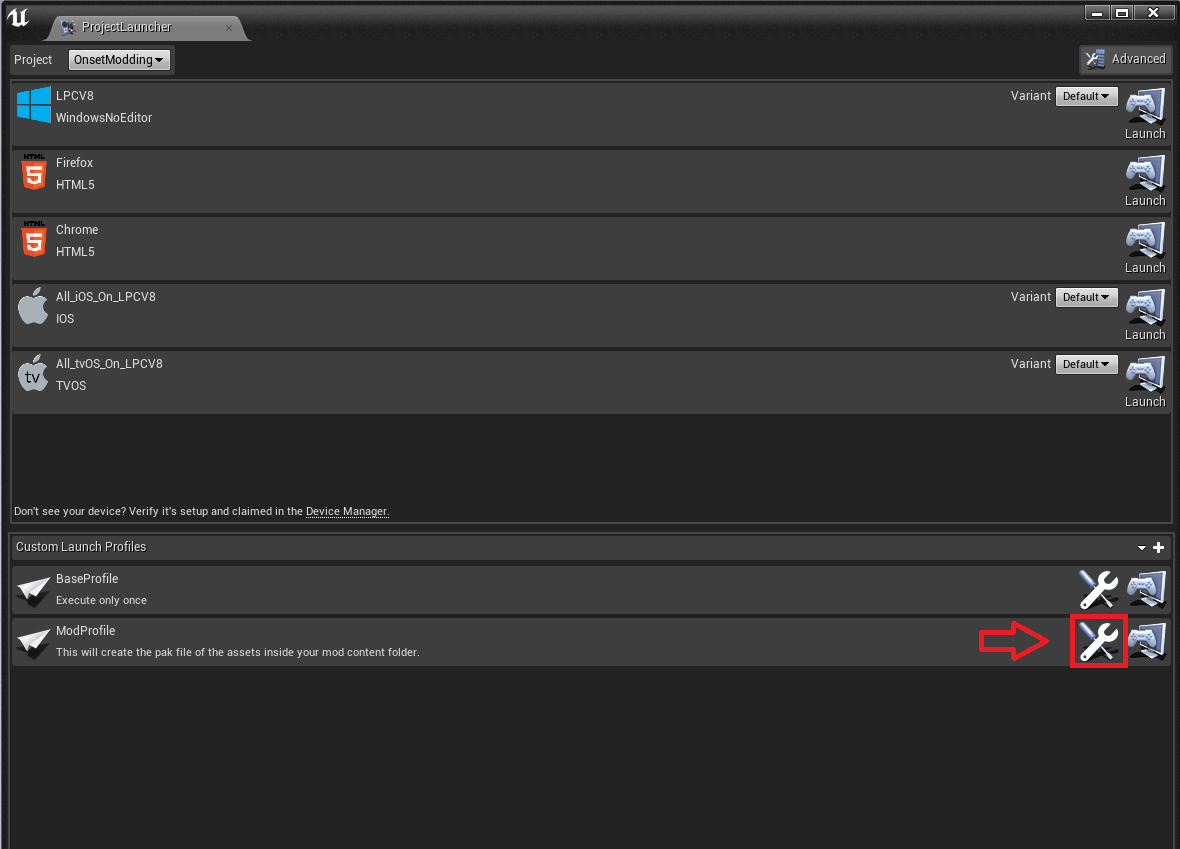
We now continue to package all of your assets into a single .pak file. Go to "Window" -> "Project Launcher":
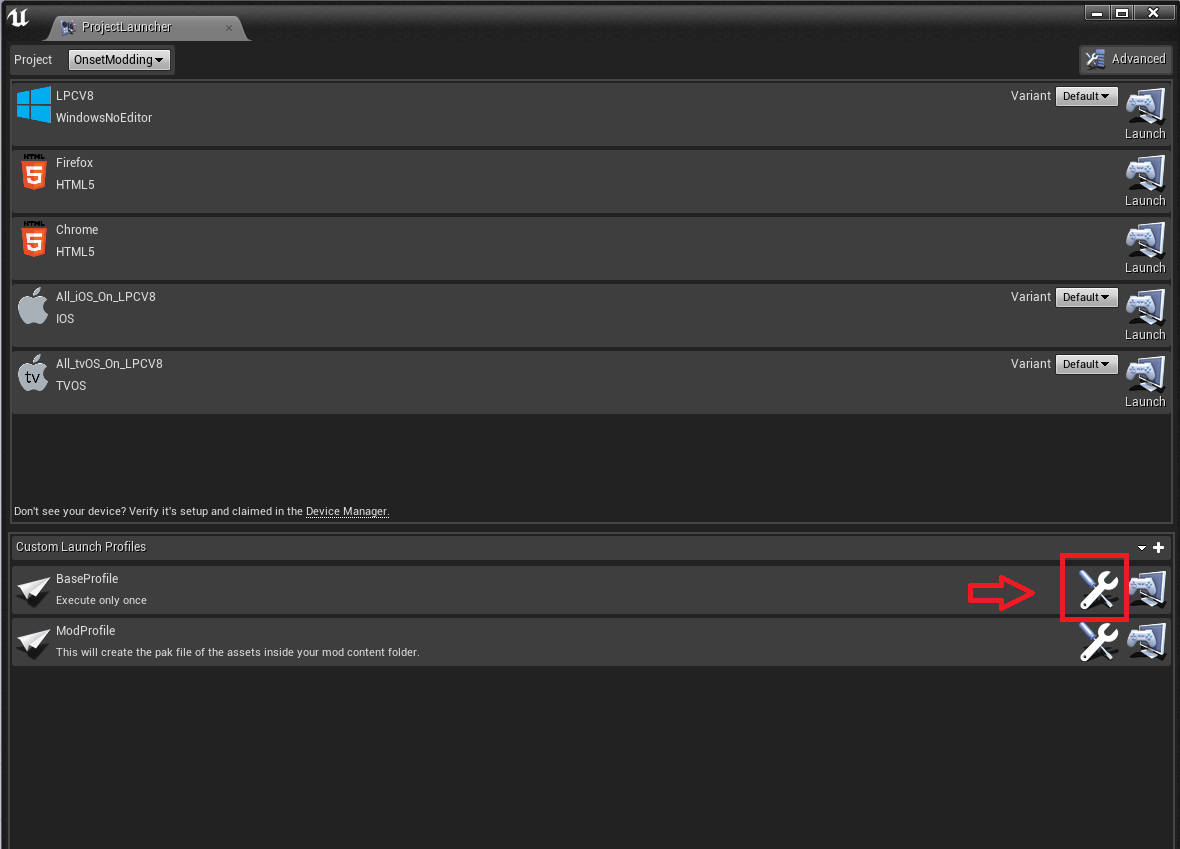
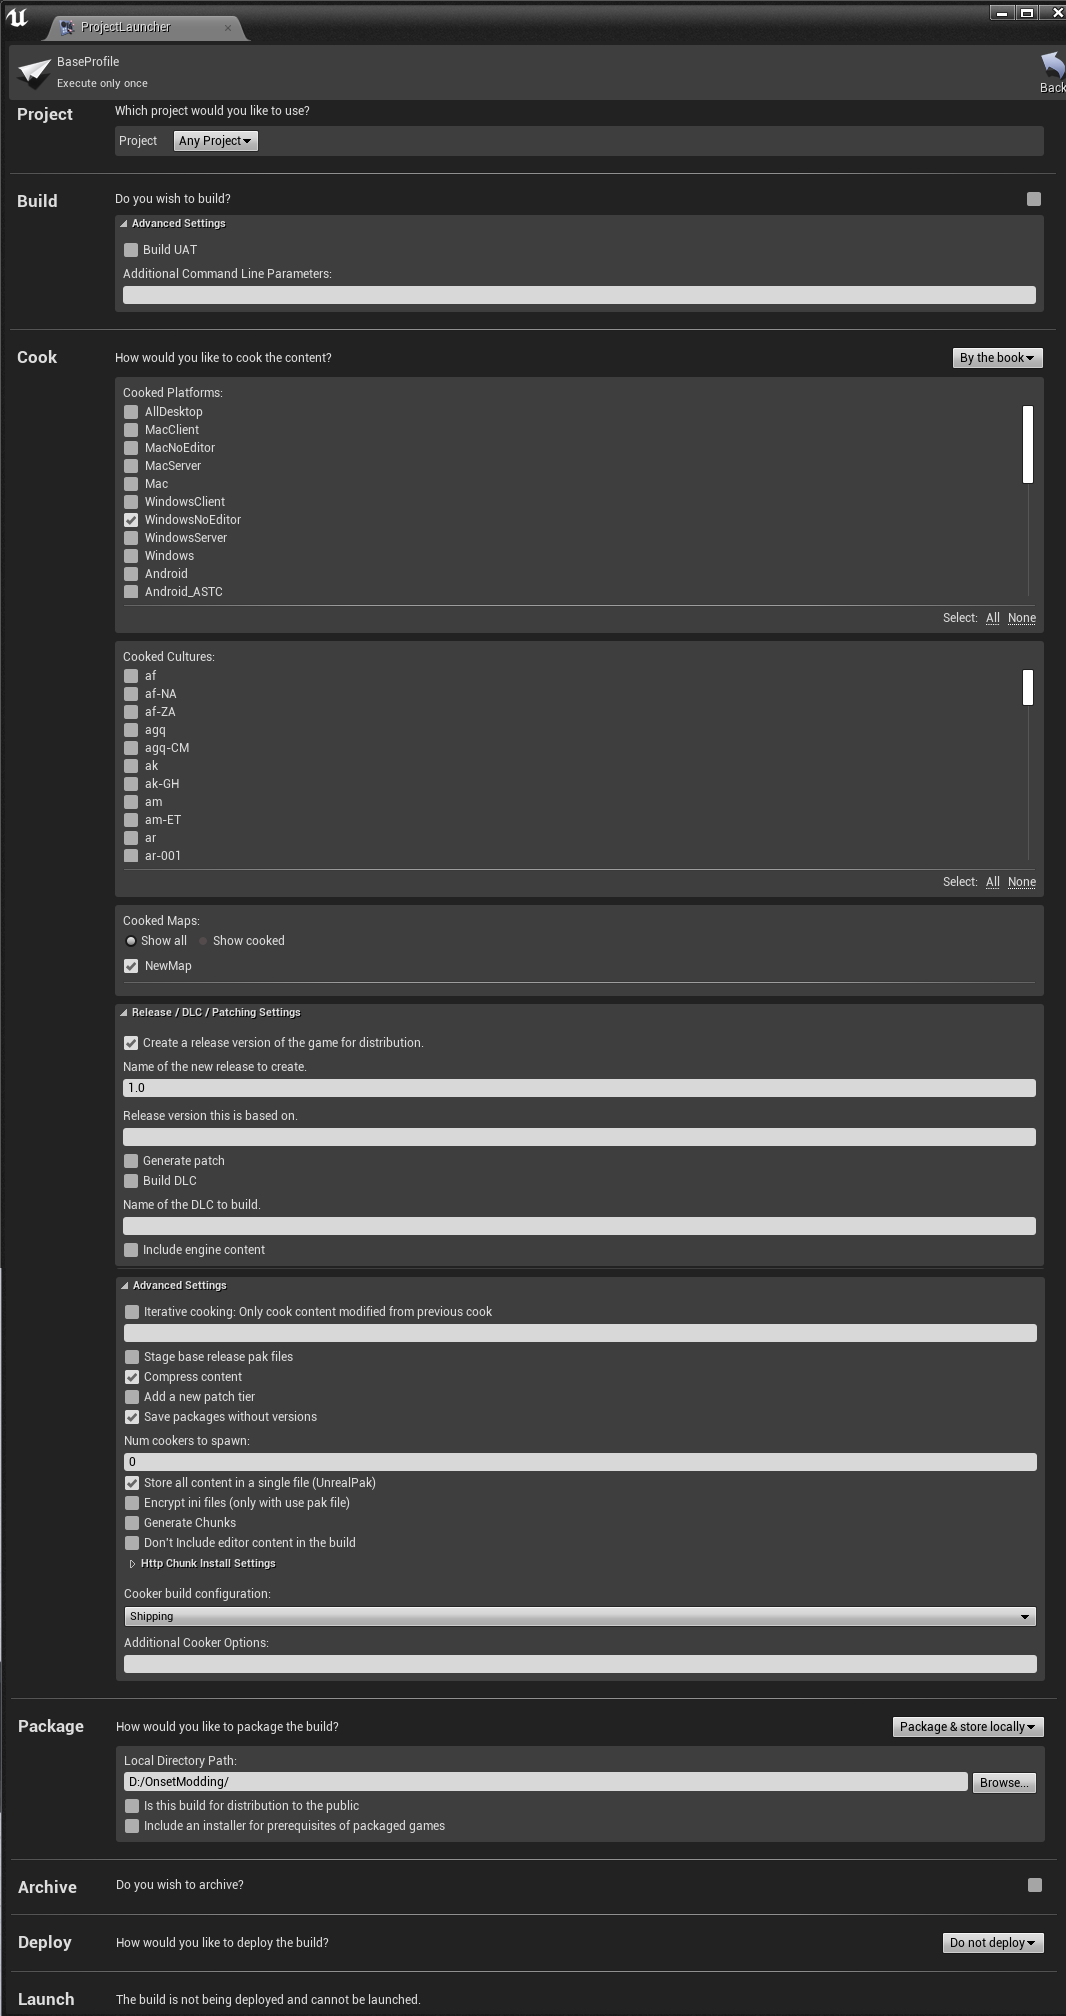
Edit "BaseProfile".
Check every setting so that it looks like in the image below.
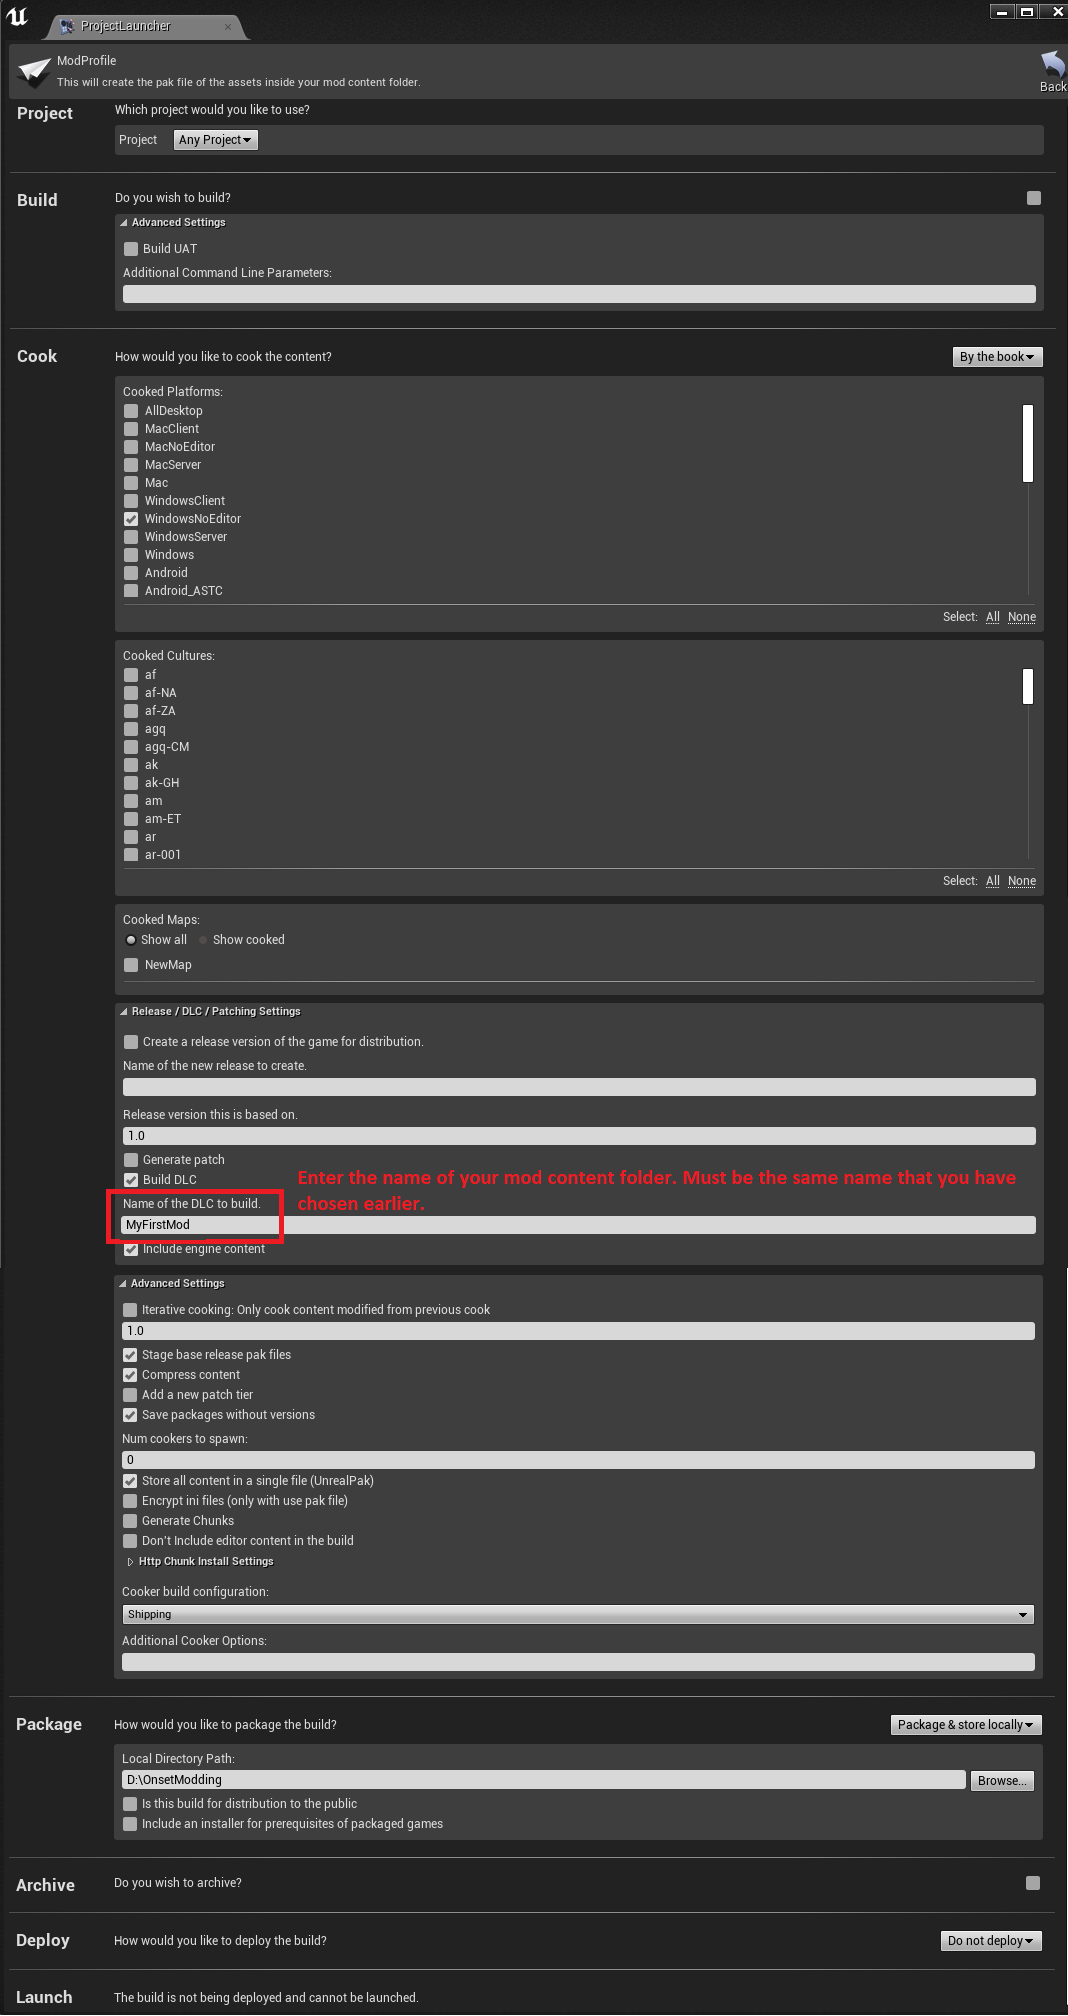
Go back and edit "ModProfile".
Make sure the settings look the same as in the image below. The most important setting is "Name of the DLC to build". This must be the same name that you have chosen earlier. The package path is where the .pak file will be saved.
Once your profiles are correct click, package the BaseProfile. You only have to do this a single time.
Then package the ModProfile.
