Modding: Difference between revisions
No edit summary |
No edit summary |
||
| Line 72: | Line 72: | ||
If you are familiar with Unreal then you can skip this: | If you are familiar with Unreal then you can skip this: | ||
[[Import3DModel]] | [[Import3DModel]] | ||
You can also watch any Unreal tutorial on | You can also watch any Unreal tutorial on YouTube on how to add and setup your models in Unreal. | ||
= Package your content = | = Package your content = | ||
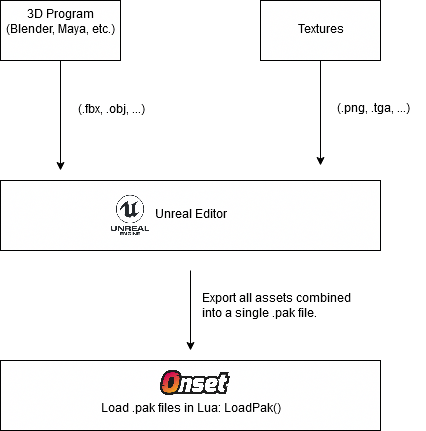
We now continue to package all of your assets into a single .pak file. | |||
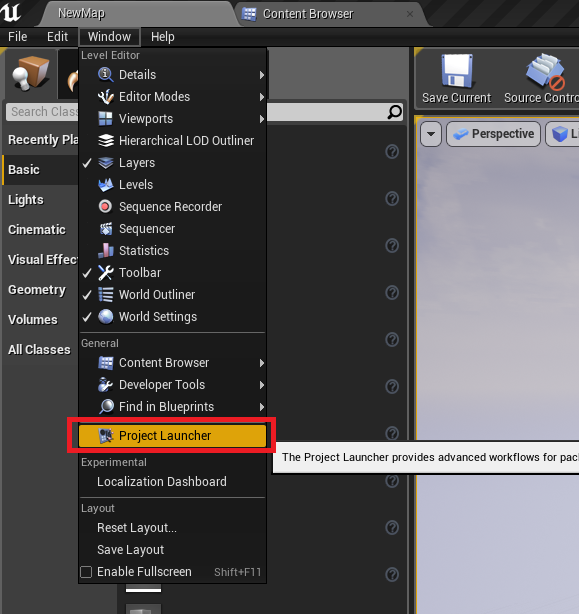
Go to "Window" -> "Project Launcher": | |||
[[File:Mod_OpenProjectLauncher.png]] | |||
Revision as of 12:21, 6 November 2019
Workflow
Lua Modding Functions
Onset Engine Version
| Versions | |||||
|---|---|---|---|---|---|
| Onset Version | Engine Version | ||||
| 1.0.0 | UE 4.23 | ||||
Create the Unreal Mod Project
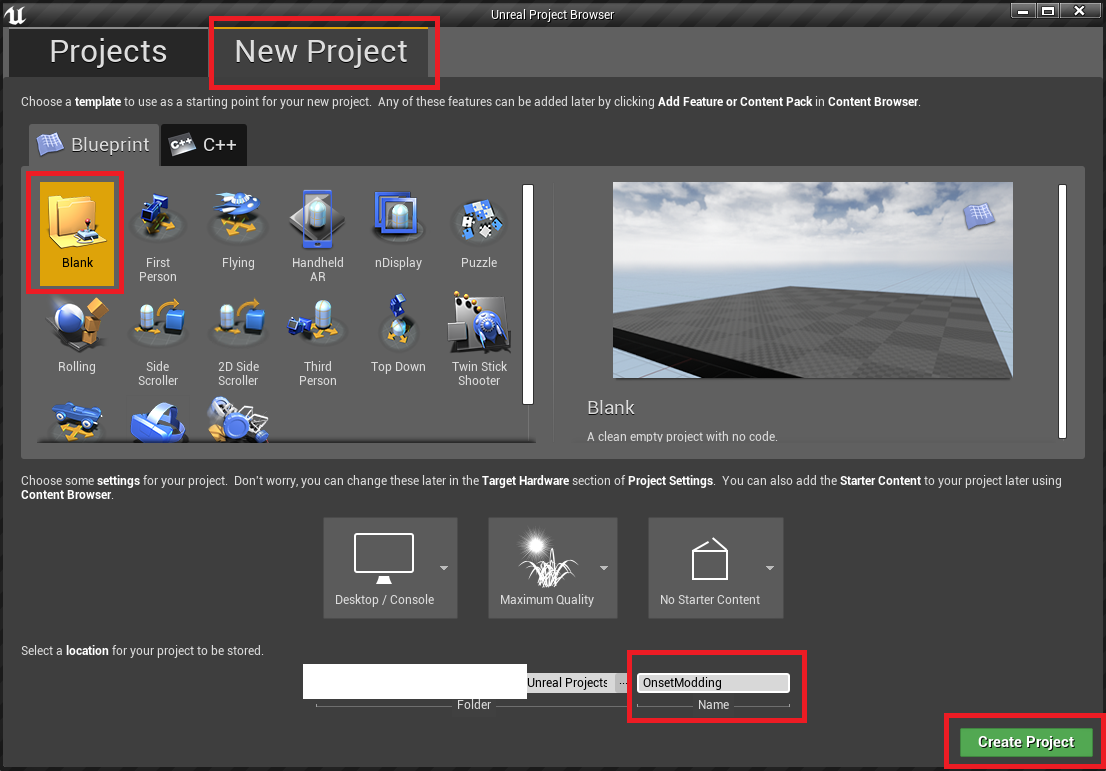
After installing the Unreal Engine, launch it.
Name your project and then click Create Project. This is not the name of the mod.
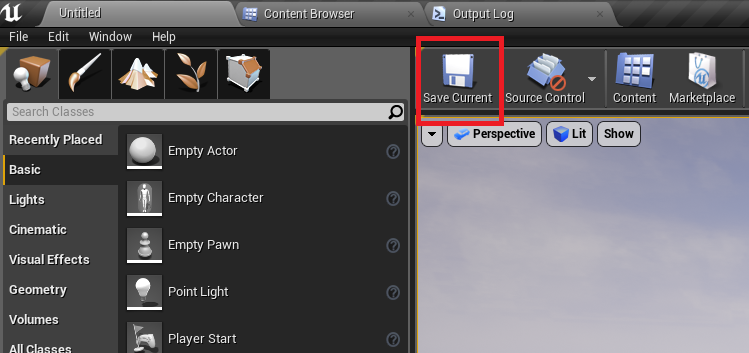
First thing to do is to save the initial map. Unreal Engine requires this later on for the packaging process. Hit the "Save Current" button.
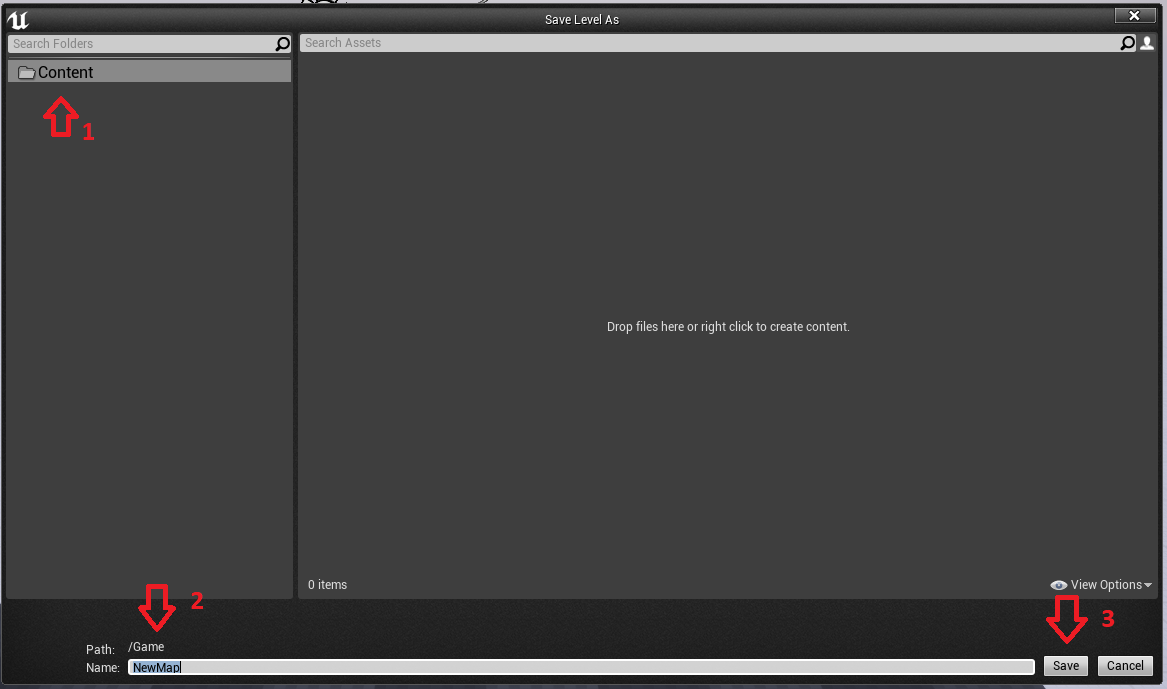
Make sure it looks like this and then click "Save".
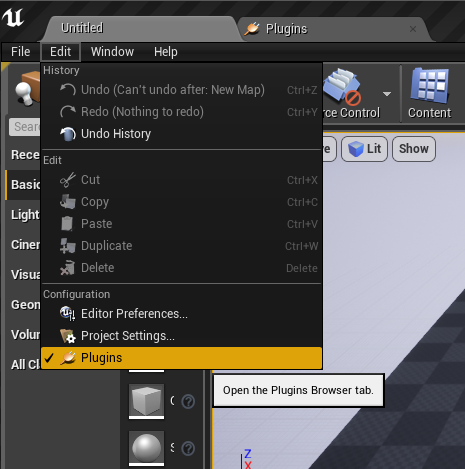
Go to Edit -> Plugins
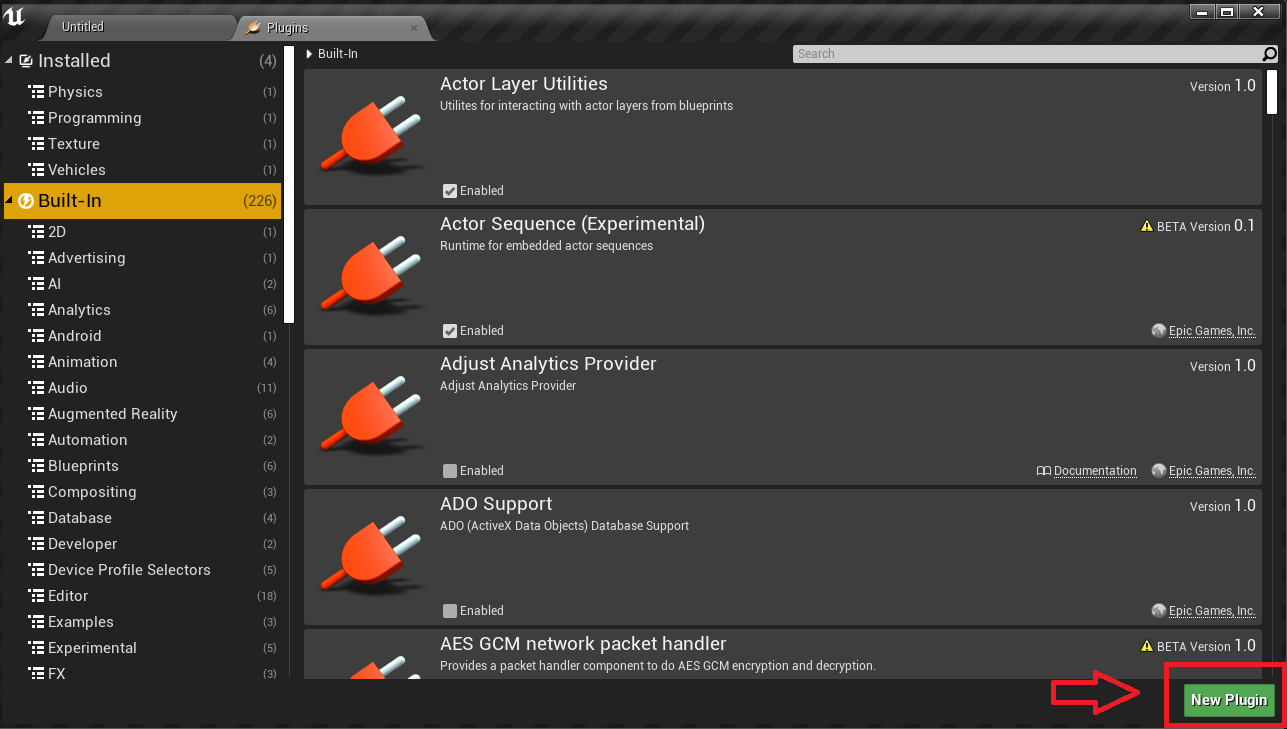
Select "New Plugin"
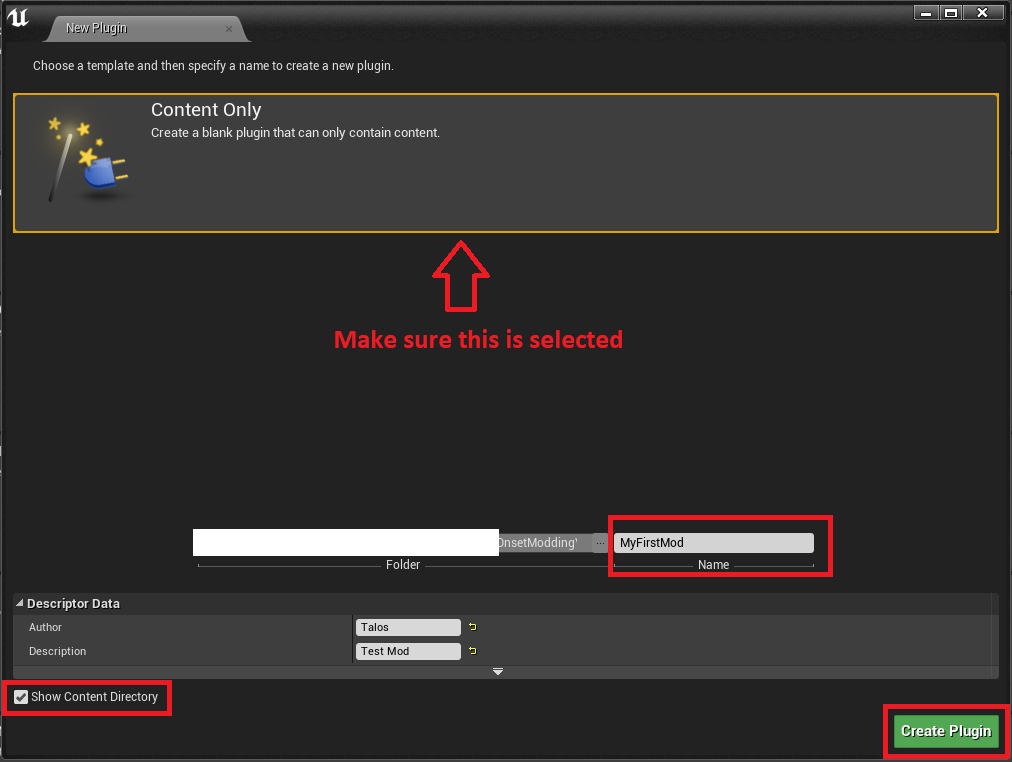
Select "Content Only". Enter a mod name. Make sure "Show Content Directory" is ticked. Then click "Create Plugin".
You will see this message.
Introduce Content
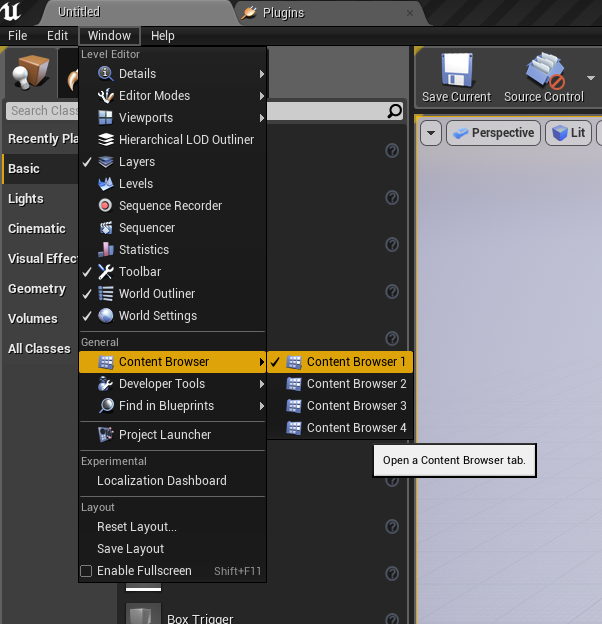
Open the Content Browser.
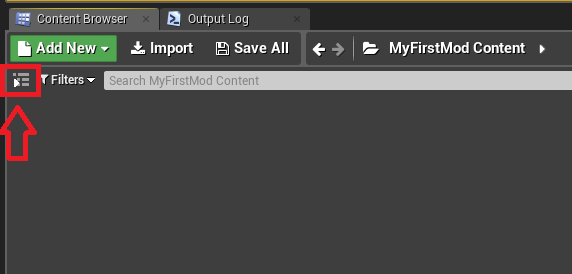
Click this icon to get a folder overview.
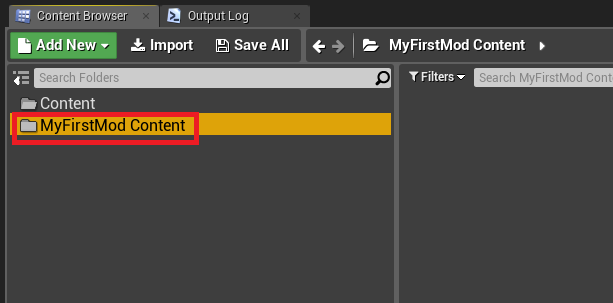
All files that you import will need to be placed inside your mod content folder (MyFirstMod).
If you are familiar with Unreal then you can skip this:
Import3DModel
You can also watch any Unreal tutorial on YouTube on how to add and setup your models in Unreal.
Package your content
We now continue to package all of your assets into a single .pak file. Go to "Window" -> "Project Launcher":
