Custom Maps
Since Onset 1.3.0 loading of Unreal Maps/Levels is supported.
Creating a custom map
Head over to Modding to get started with setting up the Unreal Editor.
Create a new plugin folder as described on the page above. Your map and all of it's assets (meshes, materials, textures, etc.) must also reside in this folder. To package the map as a pak, follow the procedure "Package your content" as described on the page above.
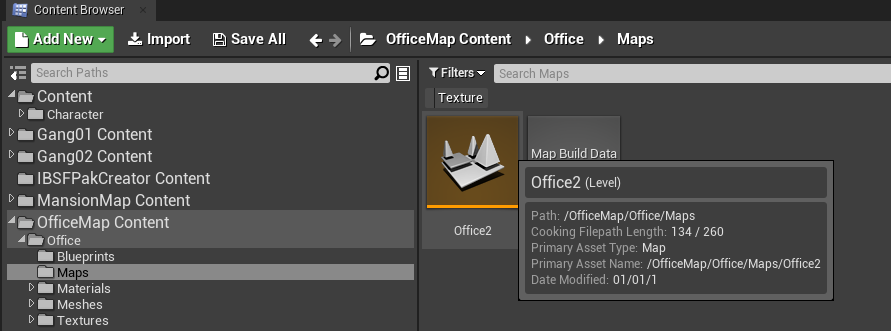
This is how it should look like in the Editor:
For creating and designing levels you can read the Unreal Engine documentation or watch any tutorial on YouTube.
Footstep sounds
To get different footstep sounds for the surfaces on your map you can have one of the following keyword in the name of the material.
metal, grass, concrete, gravel, ground, wood, carpet, sand, water, snow
Map requirements
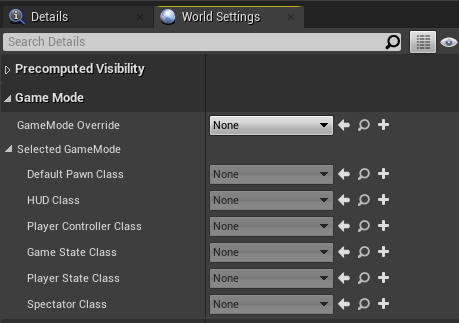
The world settings of the map must not have a custom game mode set. The settings must look like in the image below.
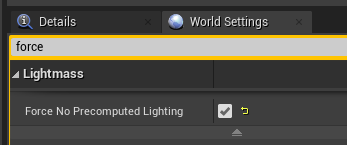
Baked lighting (lightmaps) is not supported. If you package a map from the marketplace it might have baked lighting. To disable that set the following setting to true in your world settings.
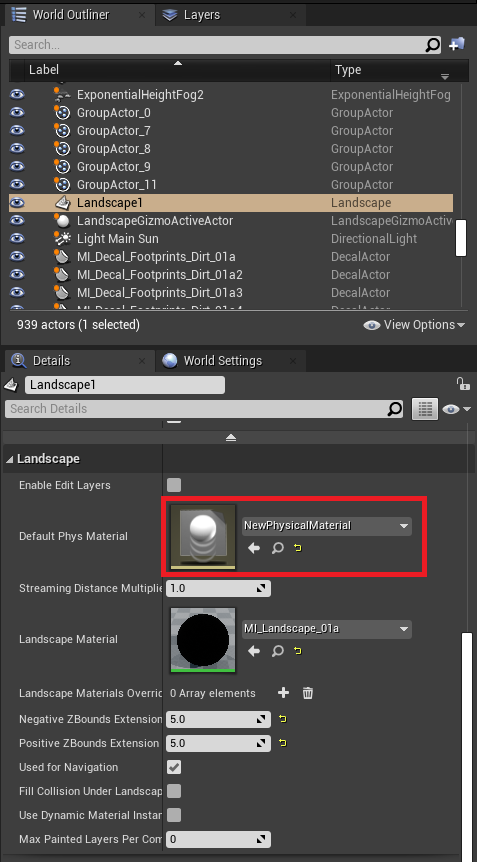
Maps using landscapes might crash the game when loading. To solve this you must assign a new physical material to your landscape actor. In Unreal Editor go to the Content Browser and go to your plugin folder. Right click and select Physics -> Physical Material. Now select your landscape and assign the newly created physical material.
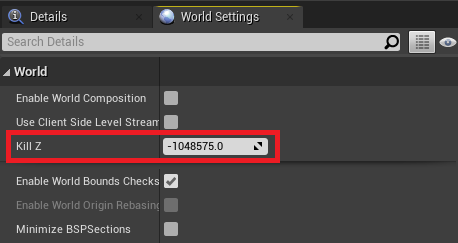
The KillZ value should be left at it's default value. Otherwise players might not be able to spawn on the map.
Reducing map file size
Reducing texture resolution is the fastest way to save space. For large meshes a 2048x2048 resolution is fine. For smaller meshes 1024x1024 or even 512x512 is enough.
In the Unreal Editor open a texture -> Compression -> Maximum Texture Size -> Enter the maximum size as an integer. You can also set that for multiple texture assets at once. Select multiple textures by holding the CTRL key or SHIFT key. Right click on them -> Asset Actions -> Bulk Edit via Property Matrix -> Compression -> Maximum Texture Size.
Loading a custom map
At first, the pak file with the map must be loaded by the LoadPak function. Then, in order to load it, the player must reconnect to the server. The function ConnectToServer has a parameter to specify the new map. The game will load the map and then connect to the server again. A reconnection is required because existing actors and entities on the map (vehicles, objects etc.) are being destroyed by the engine when a new map loads. This method is also the standard way Unreal handles level/map changes.
In a future update a function to seamlessly load a new level might be added. Unfortunately in the current engine version this approach is a bit broken.
Example Office Map pak file: https://drive.google.com/file/d/1oRrnx4MlWpfnW-GNTdQGmfeetOyqlxgN/view?usp=sharing
Make sure to add the OfficeMap.pak to your package.json.
AddEvent("OnPackageStart", function()
	print("OnPackageStart")
	print(GetWorld():GetMapName())

      -- If the current map is not the Office2 map then load it.
	if GetWorld():GetMapName() ~= "Office2" then
		LoadPak("OfficeMap", "/OfficeMap/", "../../../OnsetModding/Plugins/OfficeMap/Content/")

		local mapname = "/OfficeMap/Office/Maps/Office2"
		ConnectToServer(GetServerIP(), GetServerPort(), "", mapname)
	end
end)
When a player quits playing on your server the game will load the original map again. If you would like to load the original map for a player. You can do so by loading:
/Game/Levels/Island
